 VHIKK X
firmware
back
VHIKK X uses a custom USB bootloader so that users can update firmware, back up savefiles, and grab diagnostic/troubleshooting info.
how to update
VHIKK X has a USB Type C port on the right side of the module for firmware updates.
You will need to remove it from your rack to access it - make sure to turn off the power supply before doing so.
Disconnect VHIKK X from your eurorack power supply, and connect VHIKK X to a host computer using a USB C to C cable or a USB A to C cable.
Avoid touching the exposed circuitry on the back of the module, and avoid placing it down on a conductive surface (try to hold it by the edges of the front panel).
Make sure the cable isn't a ‘charge-only’ cable (this is a recurring troubleshooting issue, please double check!).
If the connection is succesful, the LEDs on the module should start a slow pulsing pattern, and a removable drive should show up in your file explorer named ‘VHIKK X’ containing 5 files.
If this isn’t the case, go to troubleshooting.
To check your current firmware version open the HELP.TXT file and look for the fw.ver field in the diagnostics section.
To load a new firmware image, save a firmware file from below, and locate the desired vkxfw___.vkx in your file explorer.
Paste or drag this file onto the VHIKK X drive.
The rectangular LEDs should blink while the update is in progress. This should take around 10 seconds.
When complete, the rest of the LEDS will blink quickly and the module will reset and automatically eject itself.
(You can safely ignore any warnings about ’safely ejecting’ or unmounting).
Once the drive reappears, the update has been successful.
Check fw.ver in the HELP.TXT text file to confirm that the module is now running the new firmware version.
If there are any faults or interruptions during the update procedure, the internal bootloader will be safe so you can simply try again.
The HELP.TXT file that shows up on the drive has some diagnostic information and logs in case you are experiencing any issues.
bootloader info
The VHIKK X USB removable drive contains the following files:
- MANUAL.HTM - links to the manual website
- FIRMWARE.HTM - links to this page
- VKXSYS.BIN - system memory dump - may be needed for troubleshooting
- HELP.TXT - some useful hints, and version info/logs
- SAVEFILE.VKX - your currently saved params for BASIS/TIME/SEED/SCAN for all banks/algorithms
- This can be saved to the host for backup and then reloaded later, or shared with others.
- Copy the following savefile onto the drive to initialise all params back to factory default: INITSAVE
- Drag a savefile onto the drive to load it onto VHIKK X - the LEDs will blink to indicate success.
troubleshooting
- Please check that your cable is correct and working properly.
- Try to verify the cable with another USB-C device.
- If you are using a USB adapter, hub, dock, or monitor to connect to the VHIKK X, please try to connect directly to an on-board USB port instead.
- If you are using a USB-C to A adapter with a USB A to C cable please make sure that the adapter is connected to the host device and not the VHIKK.
- Try flipping the connector first at the module end and then at the other end if it's a USB C to C cable
If you are still having issues please contact me with the following information:
- What are the first 2 digits of your serial number on the back of the module?
- What host device are you connecting VHIKK X to?
- What OS version is running on the host device?
- What type of cable are you using?
- Are the LEDs slowly pulsing on the module?
- Can you see the drive in your file explorer?
- Can you see the 5 files on the drive?
If you have a module from the original batch of 30 (green circuit board, and first 2 digits of serial number are 00 or 01) - you may need to update the bootloader to fix some cross-platform compatibility issues.
This involves using the DFU updater built into the main chip, which is a bit more involved than the normal firmware update procedure outlined above.
This only applies to the first batch, and only needs to be done once to update the bootloader. Once the bootloader has been updated, future firmware updates will be the same as all later batches.
There are multiple ways to do the DFU update, but the simplest uses WebUSB with a compatible web browser. Notably this isn't compatible with Firefox/Safari or iOS devices. I recommend using Google Chrome for the update.
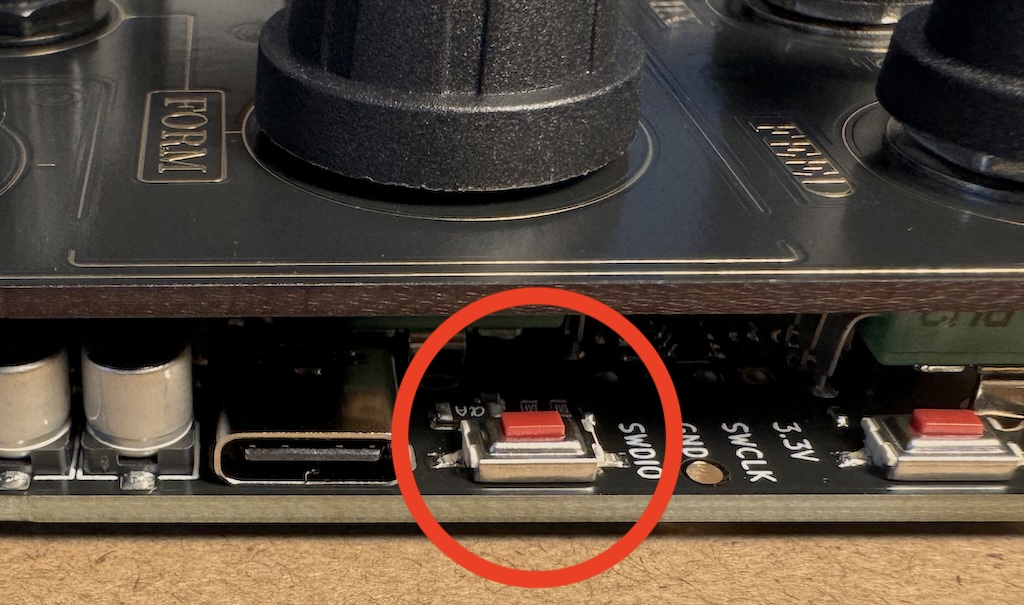
To begin, plug in your VHIKK X to your host device while holding down the BOOT button located next to the USB port.

This can be a little bit tricky so make sure not to put the module down on anything conductive, and try not to touch the back of the module with your hands (especially if you are wearing rings).
The LEDs should be static, if they are pulsing red then the module has entered the custom bootloader so you will need to try again.
Head to this website for the recommended 3rd party DFU update utility.
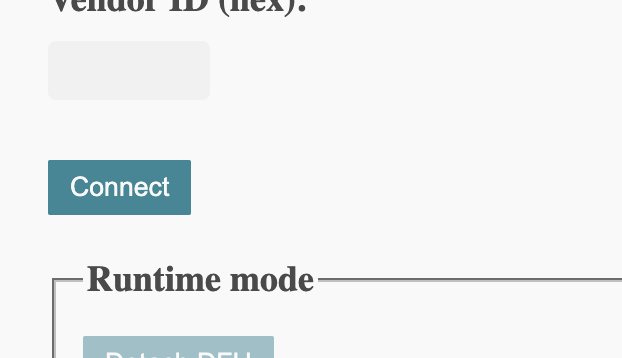
Press the Connect button to connect to the VHIKK X's DFU bootloader.

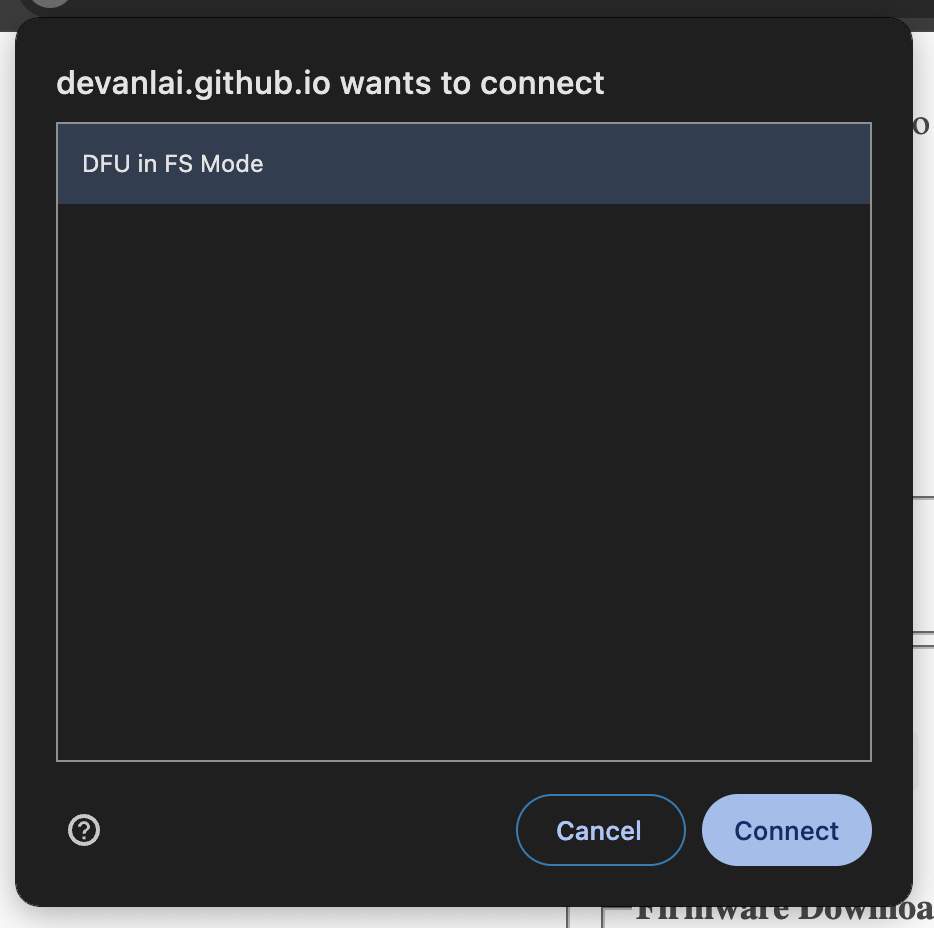
Select DFU in FS Mode from the pop-up.

Click the top option and hit Select Interface.

Download this VHIKK_X_BOOTLOADER.bin file to your computer and then select it from the Choose file dialogue. Press Download and wait for the erasing and copying processes. This will take around 10-15 seconds.

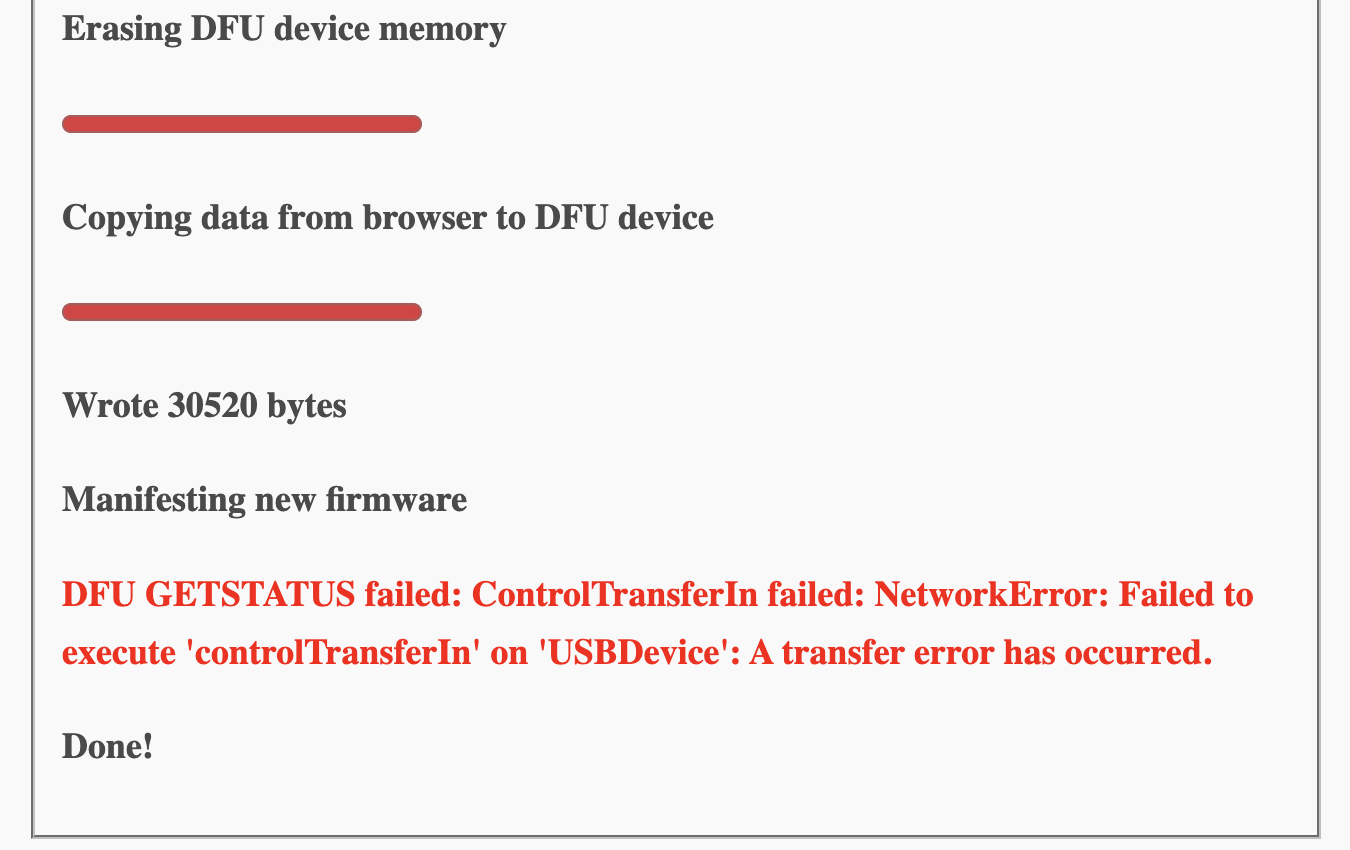
You should see these messages and the module will reset and show up as VHIKK X in your file explorer. You can safely ignore the error.

If these steps were completed successfully your VHIKK X will now have the latest bootloader and you can proceed with the normal firmware update procedure outlined above.
firmware files + info
00000002
- original firmware at launch
00000003
- Quick randomisation
- Change BASIS/TIME save mode without a power-cycle
- BASIS calibration
- Encoder drift fix (fixed very slow param/pitch drift)
- Tweaked encoder acceleration
- Tweaked FIELD scaling (lpf cutoff finer resolution in top half of sweep)